
Wrappie Scrappie
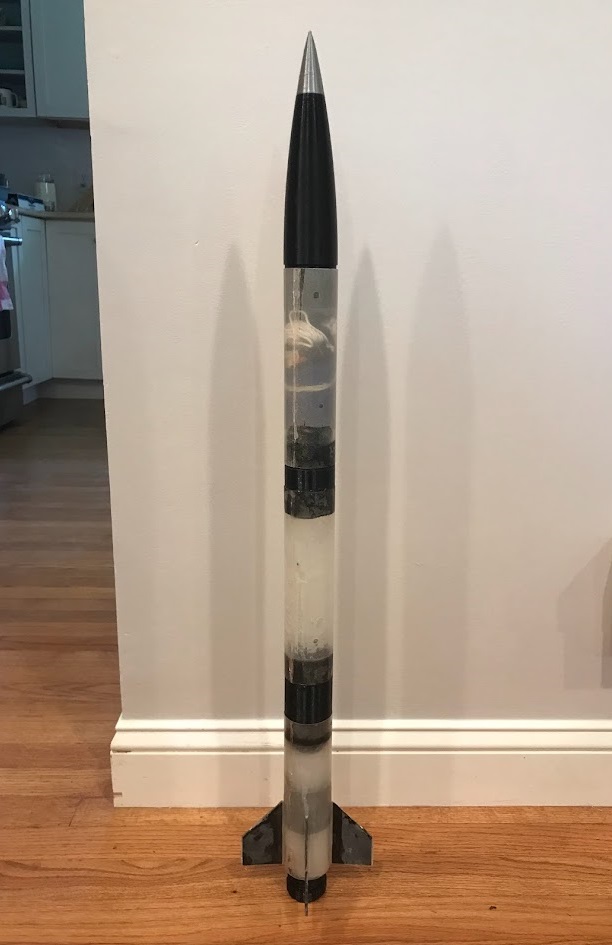
Wrappie Scrappie is an L1 high powered rocket with a homemade fiberglass airframe and fins to learn composite manufacturing techniques, which I documented in latest projects. It is 35” tall, has a 2” diameter, and weighs 550 grams without a motor. Wrappie was designed in OpenRocket for aero design and flight simulations, and Solidworks for structures CAD.
I plan to fly Wrappie Scrappie this fall with a G78 motor to 2,000 ft this fall, then to 4,000 ft with an H95 motor for my L1 NAR certification
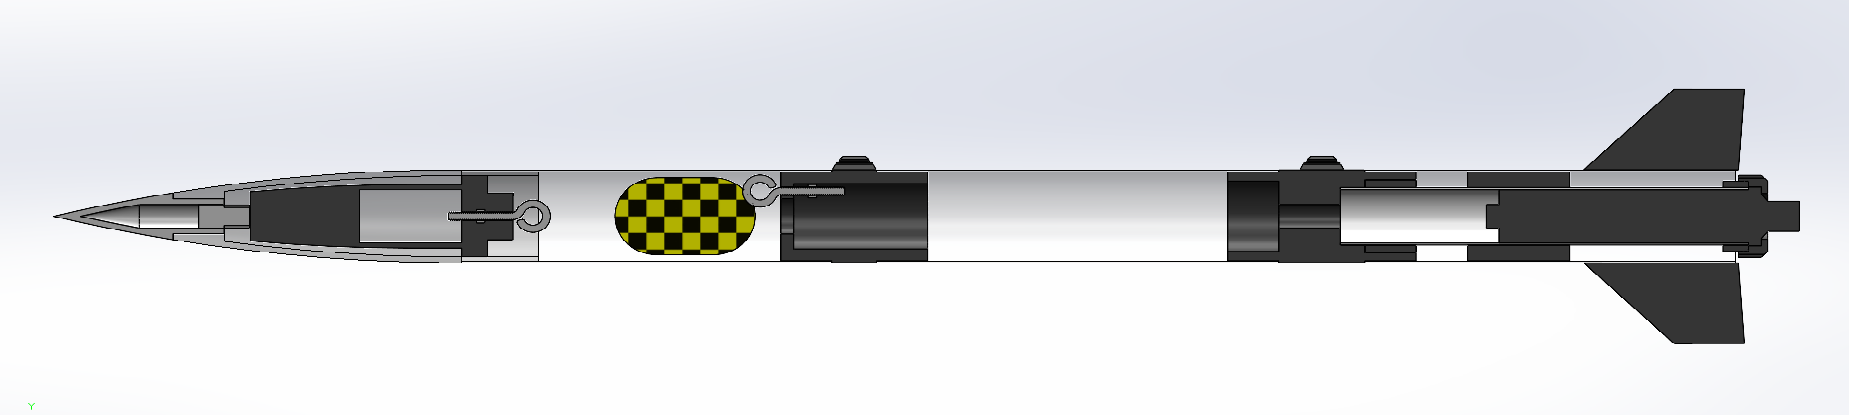
Wrappie Scrappie uses two bulkheads to connect three 8” fiberglass tubes. Avionics are sealed in the 3d printed nose cone, and the motor is housed in a replaceable custom motor casing, which screws into the lower connector. This allows for motors of different diameters and lengths to be flown in this rocket.
Motor Housing
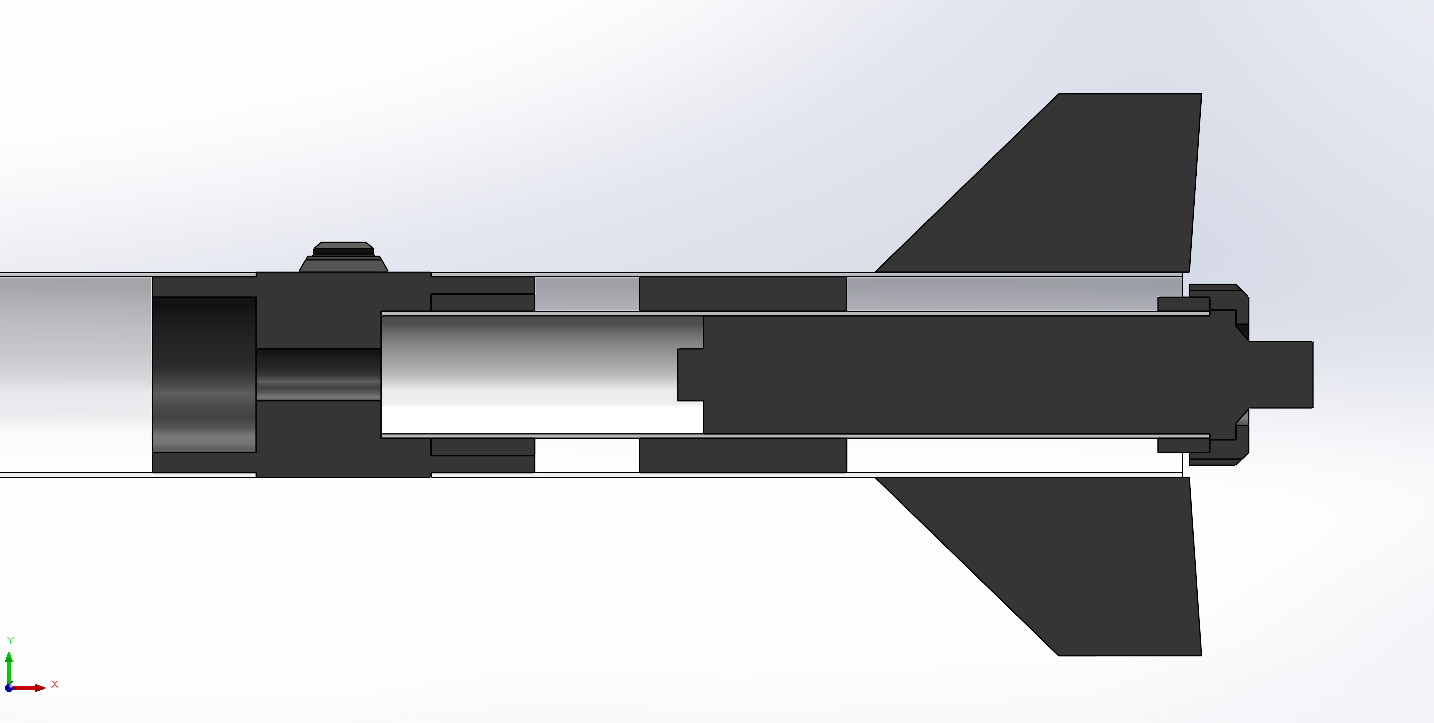
The motor housing is a replaceable assembly that secures the motor, transfers thrust into the airframe, and allows for gas from the ejection charge to reach the recovery bay. The motor is held in place by the motor retainer, which presses the lip on the motor’s base against the cardboard tube with a threaded cap. The thrust is transferred by the cardboard tube, aligned by a thick centering ring, into the motor bulkhead. The cardboard tube has 3d printed threads at the top which allow the entire assembly to screw into the motor bulkhead. The motor bulkhead has a large hole, allowing the ejection charge to reach the recovery bay.
Nosecone
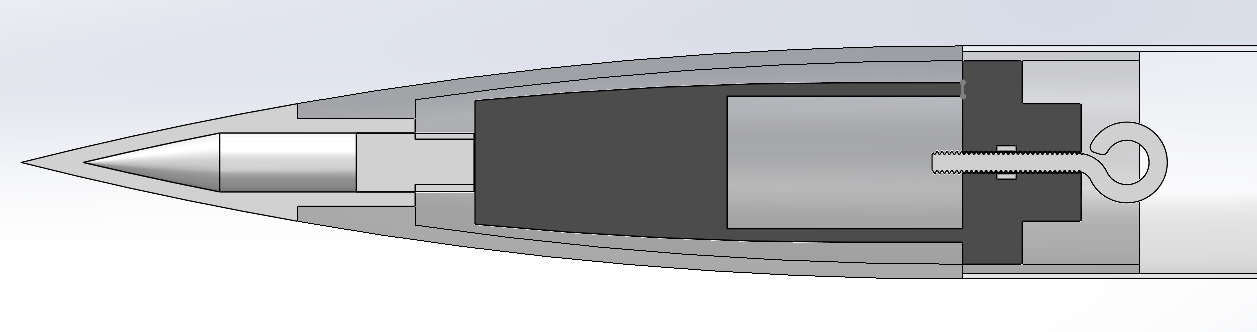
The nosecone serves the function of housing both avionics and ballast. The nose tip is a hollow part with a plug, creating a “ballast cavity” for lead weights that won’t shift much during flight. Modeling clay can also be put in the nosecone to keep the ballast from shifting. The avionics are secured to the “avionics panel”, which screws into the nosecone. This keeps the avionics isolated, and protected from the ejection charge and wind gusts during descent. The nosecone eyebolt for recovery is secured to the bottom of the avionics panel, and keeps the nosecone attached to the rocket after the parachute is deployed. The hole at the base of the avionics panel is for the battery, which is secured by the side struts and a zip tie.
Recovery
Wrappie’s recovery is a single stage main chute that is deployed by a timed ejection charge at apogee. On deployment, the nosecone separates, pulling the main chute from the recovery bay. The parachute, nosecone, and rocket are connected by a 3-way swivel. The 3d printed bulkheads, threads and steel eyebolts were tested with static loads to support up to 80 Gs of deceleration on deployment. This is a very simple recovery system, and I understand that the rocket will drift significantly on descent. However, I will be crushed if I lose this rocket, so I decided to keep it simple stupid.
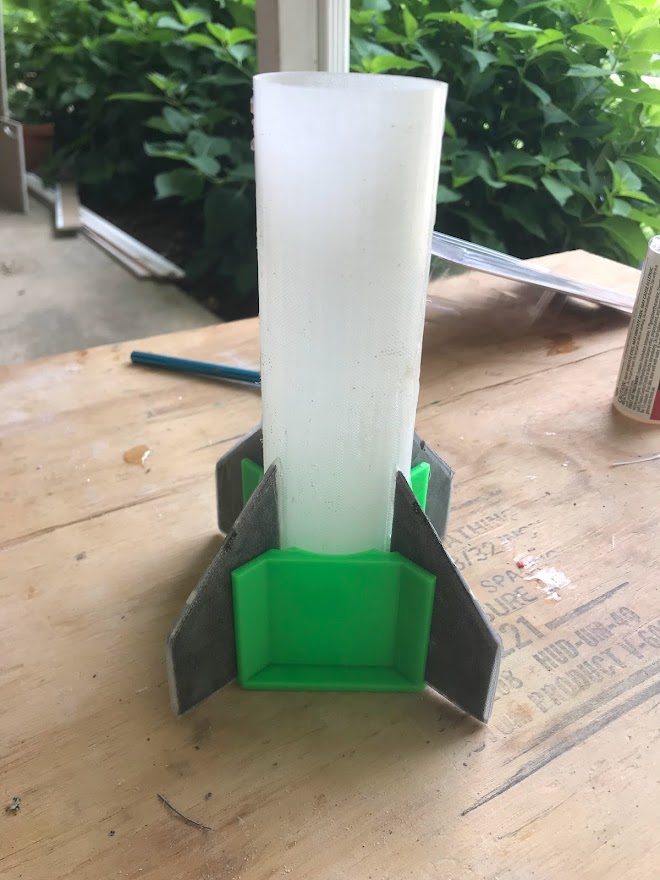
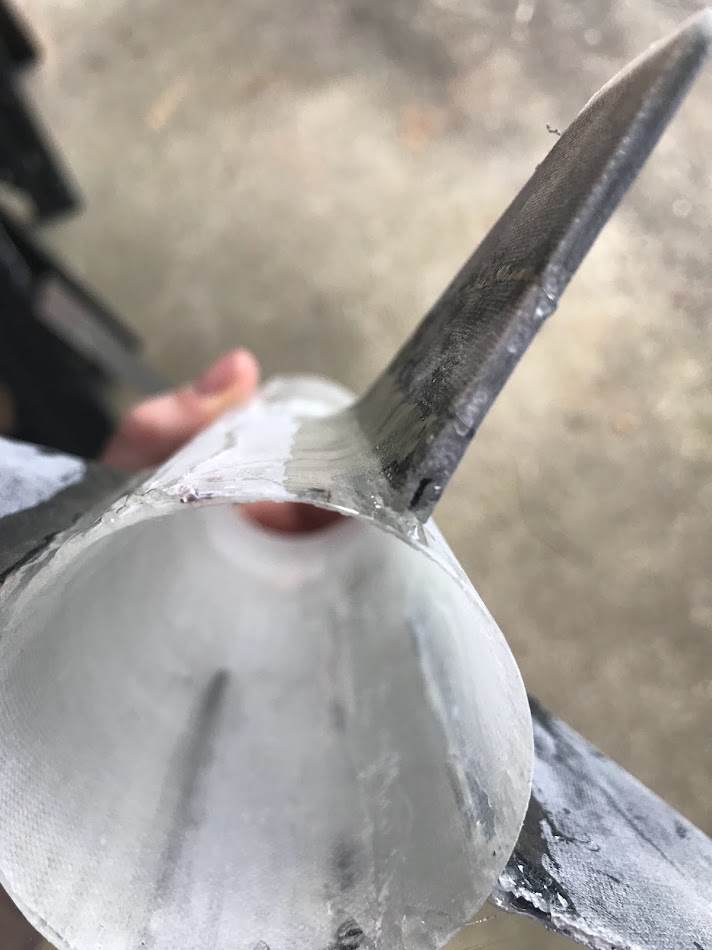
Fins
The fins are 0.060” thick 3d prints, reinforced by 3 layers of fiberglass on each side. They are secured to the rocket with epoxy surface filets. I did not do through-wall fins, since I want the motor housing to be replaceable. I originally intended to add a tip to tip fiberglass layup, but the fins are already very stiff and secure, and tip to tip layups are difficult, heavy, and expensive.
Avionics
Wrappie’s avionics consist of an MPU-6050 accelerometer and MS6511 barometer, which write pitch, acceleration, and altitude to a micro SD card, controlled by an Arduino Nano and powered by a 9V battery. The battery is overkill, but it acts as free ballast in the nosecone.